Showing posts with label Vegetable. Show all posts

Thursday, March 26, 2015

Mashed NotPotatoes Cauliflower


(Printable recipe)

There are just a few secrets to making a great flavored alternative to Mashed Potatoes if you're trying to avoid all the starch and carbs and get a few more cruciferous vegetables into your day. Cauliflower, like broccoli, brussels sprouts, bok choy, and cabbage falls into that category of cancer fighting highly detoxifying vegetables. But, as a member of the cabbage family it can turn pretty stinky if not cooked correctly. One of the biggies with cauliflower is to rescue it from the heat as soon as it has cooked through but before it becomes soft or mushy. Another little flavor helper is this: simmer it in chicken broth instead of water. All you need to add is a some low fat cream cheese or Laughing Cow in your favorite flavor and your whole family will be digging in without complaint.

Add just enough broth to mostly cover the cauliflower and reduce the heat as soon as it comes to a boil. An easy simmer instead of hard boil keeps the flavor good! Check in 10-15 minutes and as soon as a knife slides easily into a floret take it off the heat.

Using a slotted spoon transfer the cauliflower to food processor (draining it well). Any extra liquid makes the final mash too soupy. However, add some of the cooking broth and a 1/2 cup of grated cheddar and you'll have a very tasty cream soup without the explosion of carbs and calories in real cream soups.  Back to Mashed NotPotatoes:
Add 3 or 4 Laughing Cow cheese wedges or 3 or 4 Tbs of low fat cream cheese, flavored type if you like.

Process until smooth and finish with salt and pepper or a blend you like such as my all-purpose favorite used here: salt, pepper, garlic powder. (Always out on my counter.) This is ready to serve now or holds well in the fridge for days.


This spring we're all blogging together with the Food Network and we'll be doing lots of Sensational Sides. Check out these other great ideas for mashin' it up:


Thursday, November 13, 2014

Spicy Carrot Spread/Dip (Gluten Free-Dairy Free)

Printable Recipe
Add a nice colorful splash to the appetizer table at your next gathering with this tasty carrot dip. It's always a challenge to find something other than hummus to dip or spread on a cracker for those of us who are better off avoiding dairy and gluten. This is the perfect solution for that, besides tasting really good!
1 Tbs Sesame Seed, 1/2 Tbs Mustard Seed, 1/4 tsp Cumin Seed
You'll need a pound of carrots, some olive oil, and three seeds: sesame, mustard, and cumin.  A little cayenne will spice it up even more.  Start with the seeds in a dry skillet over medium heat and shake them around for 2 or 3 minutes until they are very fragrant and toasted slightly darker. And stand back or you might get a popping seed right in the eye. I warned you.

I used a japanese mandoline for speed and to slice the peeled carrots thin so they would cook quickly. Add 1/4 cup water to the the skillet and a sprinkle or two of salt and cayenne, depending on how hot you like it!
Cover and cook about 20 mintues, stirring a few times, just until the carrots are tender. Add a spoonful of water if they're starting to stick to the pan before they're cooked through. Move the mixture to the food processor and blend until smooth. Add a tablespoon of good tasting olive oil about half way through processing. This will enrich the spread and make it smoother too. Serve warm or cold - its delicious either way!
Costco's Extra Virgin Toscano Olive Oil is always a good choice. (Year of pressing is always printed on the label, too.)
   
Try as an alternative to typical bruschetta, toasted till warm.

It's Fall Fest
 at the Food Network website where you'll find my foodie blogs along with other great food lovin' bloggers, offering up our best ideas all the way through the holidays! Stay tuned for favorite Thanksgiving side dishes next week and in the meantime check out these other delicious carrot dishes:

Thursday, July 24, 2014

Quick Thyme Corn Cobbettes


These little corn cobbettes are cooked entirely in the microwave, first in the husk for just 2-3 minutes (so that they can be quickly and cleanly popped out of the husk), then finished with some fresh thyme and buttery olive oil and given another minute or two in the wave to steam. The result is sweet, fresh and juicy corn that's ready fast and isn't the least bit waterlogged from a vat of boiling water. And 6 ears served this way will stretch to feed 7-9 people easily, without waste.
Use fresh thyme of any kind; this one is lemon thyme.
To begin, do nothing at all to the corn, just give it 3 minutes in the microwave, husk and all. If your wave is powerful enough, heat 5 or 6 ears at once, otherwise do only 2 or 3 at a time. This is the secret to clean easy removal of the husks.
Cut away the stalk end, cutting just above the base of the cob.
Make a 1" slit through the husk in several places around the base.
Grab the tassel end and tap out the corn cob, completely silk-free.
If you've seen any of the YouTube demonstrations for this perfect method for cleanly shucked corn, you may not have realized that the initial microwaving is critical to success! There is no shaking that corn free if you try this method on a raw piece of corn; unfortunately some instructionals leave out the essential microwave step.
To produce cobbettes without crushing any of the kernels, it's best to use a serrated knife and saw a little way into the cob wherever you want it to break. It will easily pop apart. I remove the tip end as well where the kernels are sparse. 
For a healthier alternative to butter, look for butter infused olive oil in larger groceries or specialty shops such as Flavored Oil and Vinegar stores which are prevalent these days in most cities. If you can't find the buttery flavored EVOO, use a mild one with a flavor you like and drizzle just enough to very lightly coat the corn when tossed together. 

Finally, add the fresh thyme, as much as you like. Unlike the dried version, these little leaves are bright and light flavored and you can use plenty. The leaves strip away easiest if you pull the stem through your fingers backward, that is in the opposite direction that the leaves grow. (Discard the stems.)
Now, to the microwave one more time, just 2 minutes more sealed under a tight wrap to create a little steam chamber. You can save this step until the last minute if you've done the rest ahead of time and serve these babies up hot and steamy. 

SummerSoiree is on at the Food Network blogsite! Stay tuned each week for fresh ideas for your finds at the Farmer's Market or delicious dishes for picnics and parties all summer long. Get more recipes here from friends and family:


Thursday, July 10, 2014

Pineapple Jalapeño Coleslaw

(Printable Recipe)
If you like your coleslaw a little sweet and creamy, you'll probably love this cold-sweet-hot twist on the classic version. I've also switched up the basic dressing by using rice vinegar which is milder and sweeter than white.
For 4 cups of shredded cabbage, use 2 small jalapeños, 1 sweet red pepper like this one or 1/2 a sweet red bell pepper, 1/3 whole pineapple, and 2 or 3 chopped scallions (green onions).  I prefer the flavor and firmness of a fresh pineapple, but canned could be substituted. Use a small can of tidbits, chopped a bit more, rather than crushed which would be too mushy. 
Seed the jalapeño if you can't take the heat!
Finely dice the peppers by making long narrow slices, then cutting crosswise into small bits. But cut the pineapple into thin, larger pieces that will be juicier to bite into. *NOTE: I wear surgical gloves to work with jalapeños; if you're immune to their heat on your skin then go ahead and live dangerously with the bare-handed handling of them.
Now toss it all together and go make some dressing.

1/2 Cup Miracle Whip, 1 Tbs Rice Vinegar, 1 tsp Sugar
Don't feel tempted to substitute regular mayo for the Miracle Whip; its tangy-sweet balance will be completely off. I love real mayo but this is not the time for it. Whisk in the vinegar and sugar and then fold into the above ingredients. It may not look wet enough at first but the slaw will exude some its own juices after sitting a few hours and should be just right when ready to serve. Use a rubber spatula to blend well just before serving and bring the dressing up from the bottom. Delish!

SummerSoiree is on at the Food Network blogsite! Stay tuned each week for fresh ideas for your finds at the Farmer's Market or delicious dishes for picnics and parties all summer long. Get more recipes here from friends and family:

The Heritage Cook: Ranch-Flavored Cole Slaw (Gluten-Free)
Virtually Homemade: Sweet and Spicy Mexican Slaw
Napa Farmhouse 1885: Apple Cider Coleslaw
Sweet Life Bake: Cumin-Lime Coleslaw
Elephants and the Coconut Trees: Vegan Coleslaw
Swing Eats: Thai Coleslaw
Taste With The Eyes: Spicy Rainbow Slaw


Thursday, July 3, 2014

Dilly Potato Salad

(Printable Recipe)

Two things make this potato salad prep unusual, but account for it being one of the best I've ever tasted. First, the potatoes are not boiled, they're baked just long enough to keep them firm but dry enough to soak up the flavorful dressing. Second, that flavorful dressing gets its flavor from dill pickle juice and chopped baby dills instead of relish. There are other winning elements to this recipe, but I think those are the two biggies. I must give credit to my sister-in-law, Gigi, for teaching me this method. At least once, try this recipe exactly as it's written and then, hey, have at it and experiment with alterations all you'd like! 
Use Idaho baking potatoes only. 
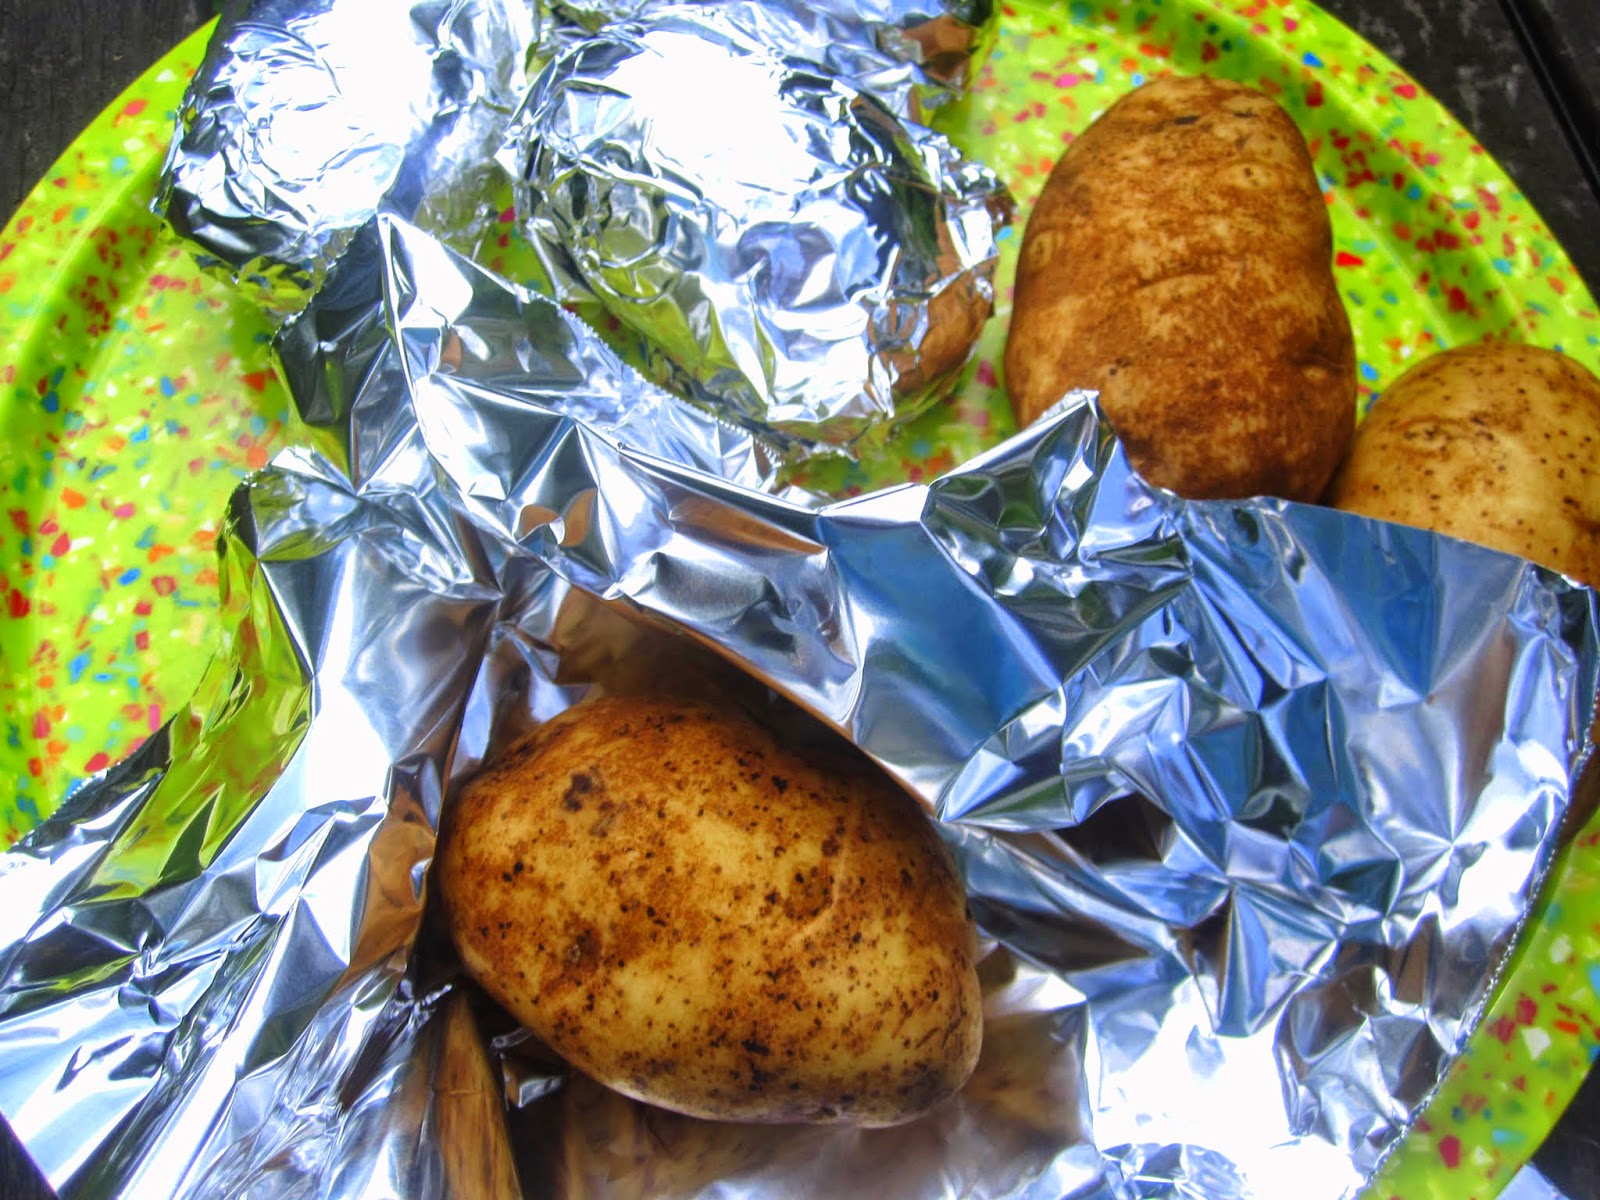
Wash 6 large potatoes, not the monsters the size of a huge zucchnini, just good sized bakers. Dry the, but don't peel them yet. Wrap each one tightly in foil to hold in the steam and bake at 350. Don't skip this part because unwrapped potatoes get too dry and mealy and will fall apart. Set the timer for about 40 minutes to check their doneness and at the same time,  put on a pan of 6 eggs to boil.
Just barely cover eggs with water.
For perfectly cooked boiled eggs, just barely cover cold eggs with water, top with a lid and bring to a boil. Check closely after 10 minutes or so and remove from the heat as soon as the water boils. Leave them covered and set a timer for 20 minutes. And let's make the dressing now while everything cooks. I like to put it together ahead of time to sit and meld flavors for a little while.
Add 3 TBS Dill Pickle Juice to 1/2 Jar Real Mayo 
In your largest bowl, whisk together the mayo and dill pickle juice. Or if you happen to have only 1/2 jar of mayo left you can do the whisking and mixing right in the jar. Chop 6 baby dills and add these to the dressing also. I use the baby dills because they're usually more crisp and firm than larger pickles, and are virtually seedless.
6 baby dills or 1/2 cup chopped dill pickle (NOT relish)
At this point, if the eggs have been sitting for 20 minutes in the hot water, drain them and stop the cooking by refilling the pan with cold water. You should be rewarded with lovely yellow perfectly done eggs devoid of that ugly green ring around the yoke. They will peel fairly easily if the eggs were at least 2 weeks old, otherwise, get those peels off however you can and chop into fine dice.
Boiled eggs will peel easily if they're at least 1 or 2 weeks old. 
Careful! Peel the foil with tongs so they can cool enough to handle.
Check the potatoes after 30-40 minutes. It's important to get them out while they're still firm enough to be cut into squares. Test this by sticking a sharp knife in and lifting.  If the potato slides off the knife slowly or barely slides at all it's probably done enough. When cooled about 30 minutes, the skins will scrape right off with a small knife.
Cube them in 1 inch squares so they will hold together better. Dicing too small may leave you with crumbles. While the potatoes are still warm, add to your largest bowl along with the eggs and fold the dressing in gently with a rubber spatula. No vigorous metal spoon stirring here so you don't end up with some weird mashed potato mess!

If you have fresh dill, snip the dill over all, salt well, and fold again. Garlic chives are another excellent addition to snip in with scissors, or you could use finely chopped sweet onion instead, preferably Vidalia. (If you don't grow your own dill the cheapest way to buy it in the store in summer is NOT in those expensive little fresh herb plastic packages. Look for big bunches of it near the parsley or pickling cucumbers and it's often just $1 or so.)

SummerSoiree is on at the Food Network blogsite! Stay tuned each week for fresh ideas for your finds at the Farmer's Market or delicious dishes for picnics and parties all summer long. Get more recipes here from friends and family:


Thursday, December 5, 2013

Kahlua Baked Acorn Squash

(Printable Recipe)
A little liqueur is a delicious enhancement to the natural sweetness of many a winter squash. These festive looking babies are Carnival Squash, love child of the Sweet Dumpling and the Acorn squash. (Sounds rather carny, I know, I know.) They are beautifully sweet and orange on the inside and make a lovely side dish to replace those overly sweet sweet-potatoes. And prep time is maybe 5 minutes including reaching into the fridge for the butter.
Use your sharpest large knife - let thin and sharp trump size if you only have a medium size chef knife. You may split from stem to stern if you prefer. I like to slice a thin piece from the pointy bottom to make it sit flat in the pan and I also cut off the top like a small lid.
IF you have one of these grapefruit spoons, you'll find it to be the best of tools for scraping out the seeds down to the smooth flesh.

Aluminum foil makes cleanup so much easier, but you still need to spray with a little Pam for non-stick-to-it-tiveness. Place the squash face down with a tablespoon or two of water and bake 30-40 minutes at 350.


Assemble the finishing touch! Melt 1-2 Tbs of butter and choose Kahlua or Amaretto. There's more than enough for half a dozen squashes in one of these tiny "airline" bottles that every liquor store carries these days. (Prefect size for all sorts of desserts and cheap, so it's worth it to stock up on a variety of flavors.)

When the squash is softened and almost cooked through, flip them over with tongs. Brush each with butter first and drizzle in a teaspoon of liqueur. Brush that all around the rim and insides several times.
Return to the oven for 15 minutes or until completely done. When the fork easily pierces soft flesh it's suppertime!
Check out these other delicious ways with winter squash. FallFest continues several more weeks as we blog together with the Food Network to celebrate winter produce. Stay tuned for Broccoli ideas next week, followed by Holiday Sides!


Feed Me Phoebe: Baked Acorn Squash with Maple-Siracha Glaze
Jeanette's Healthy Living: Thai Red Curry Chicken with Winter Squash
The Lemon Bowl: Stovetop Mac and Cheese with Winter Squash
Big Girls, Small Kitchen: Provencal Chicken Stew with Butternut Squash & Chickpeas
Weelicious: Cinnamon Roast Butternut Squash
Elephants and the Coconut Trees: Creamy Squash Rigatoni
Blue Apron Blog: Acorn Squash Tempura Tacos
Taste With The Eyes: A Hearty Tomato Soup with Sausage and Spaghetti Squash
Devour: Winter Squash Macaroni and Cheese
Dishin & Dishes: Roasted Acorn Squash Crescents with Sage Pecan Pesto
Napa Farmhouse 1885: Roasted Pumpkin & Apple Slices with Maple Syrup
Red or Green: Butternut Squash Salad with Kale, Cranberries and Cayenne
Virtually Homemade: Spaghetti Squash Lasagna with Basil Walnut Pesto
Domesticate Me: Chipotle Pork Tenderloin and Butternut Squash Tacos
FN Dish: Comforting Winter Squash Sides
Related Posts Plugin for WordPress, Blogger...